Pages

Monday, 8 July 2013

So much baking ... so little time


Wow! Time is still flying. It feels like 4 weeks, but it's been 4 months since I last posted here (slack I know).

So as a result, this is going to be a bit of a tour of the last 4 months of my cakes. I think from now on I will try and make blogging a monthly activity in an effort to keep up to date. With each cake, comes another request so it's a busy time in my kitchen at the moment. So much so that I am really considering setting up a business to do it. Sadly I don't think it will be at the stage where I can quite my day job just yet, but you have to start somewhere right?

So, onto the cake. In cronological order, here they are:

Spring Time Lemon Cupcakes for visiting a friend

Vanilla Cupcakes with vanilla buttercream made for a
Breast Cancer Awareness charity bake sale at work. 

Vanilla 8" 'fencing cake' for a friend's birthday. 

2 tiers chocolate fudge cake, 1 tier vanilla cake for the
 engagement of two good friends, Hannah and Tom
who got engaged whilst travelling the world.

A fabulous 2 tier cake for my fabulous Mum's birthday.
Top tier is a chocolate fudge cake, with the
 bottom tier a dummy in this case. 
Happy Birthday Mum!!!!
Chocolate cupcakes (upon request) made for colleagues
 at work who recently got married. 
Chocolate cupcakes for colleague's wedding.
Piggs in mud!! Chocolate cake with a dark chocolate
ganache and fondant piggies, once again for a
breast cancer awareness charity bake sale at work. 

My favourite cake so far! A chocolate
fudge birthday cake made for a surprise birthday
party for a very good friend.
Fondant bunny models and sugar flowers.


Saturday, 6 April 2013

Back to school with Fair Cake London

It's been such a long time since I posted anything on here, but not for lack of news, most interestingly, involving cake and baking :)

A few weeks ago I attended Fair Cake in Greenwich, London for my long awaited Cake Decorating Masterclass. I've been thinking for a long time that I would like to do a course to try and learn some more of the technical details around cake decorating. Up until now I've been self taught, and although I think I've done really well so far, if I wanted to take things to the next level, I needed professional help.

The Masterclass at Fair Cake is a 5 day intensive class covering stacked cakes, cookies, cupcakes, modelling and a selection of flowers techniques. It's amazing how simple things are when you know the tricks of the trade.

I couldn't have asked for a better group, better teachers, nor better facilities than we had that week at Fair Cake. So a big thanks to Jess, Nat, Charlotte, Pam and Jo for the amazing week!!

Here are some pictures of my work from the week. I'm already looking for opportunities to use the skills I learnt. If I could make cake all day/every day I would :)


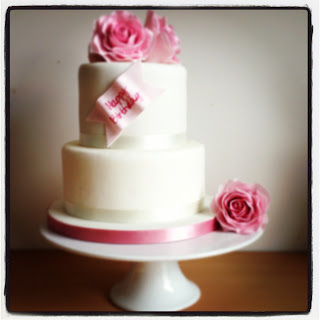
       Stacked Cake with sugar rose and flower posy

Vanilla cupcakes with sugar flower decorations

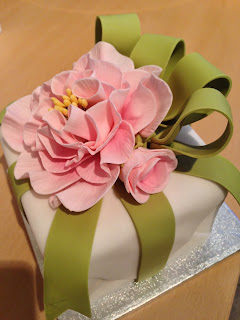
Present wrapped cake with pink sugar peony

Sugar models .... so much fun!!


Tuesday, 1 January 2013

Winter Warner

A roast and a warming apple crumble... a perfect way to spend a cold New Year's day.

I used a basic crumble recipe from Hugh Fearnley-Whittingstall, and put my own twist on it. I just can't cook apples without Cinnamon, and my mu always put sultanas in her apple desserts. 

So here it is:

Ingredients


180g plain flour
120g unsalted butter, chilled and cut into cubes
80g caster sugar
80g brown sugar
1kg Bramley apples
Zest of ½ lemon
1 tbsp fresh lemon juice
1-2 tbsp water
Handful of sultanas
Teaspoon ground cinnamon

Method

Put the flour and butter in a bowl and rub together with your fingertips until it resembles coarse breadcrumbs (or pulse it in a food processor). Tip in 40g each of caster and brown sugar and mix. Refrigerate while you assemble the rest. Preheat the oven to 180C/350F/gas mark 4.

Peel and core the apples, and cut the flesh into large chunks. Toss the apples with the lemon zest and juice, the remaining sugar and the water. Tip into a shallow, ovenproof dish.

Scatter the topping over the apples, squishing some of it into small chunks as you go, then bake for about 40 minutes, until golden. Serve with whipped cream, custard or ice-cream.


Baby shower cupcakes


My oldest and dearest friend is pregnant with her first baby and I was lucky enough to be back in Australia for her baby shower over the Christmas holidays. Obviously I offered to make some baby shower cupcakes, and thankfully this time it wasn't a buttercream melting 39 degree day so things went a bit more to plan. 

Once again I used the fail safe Hummingbird cupcake recipe in Vanilla and chocolate and their vanilla buttercream recipe, colours blue as we know the baby is a boy. 

Once again, due to my lack of excess time, I ordered some cupcake toppers, this time from Sugar and Spice Cupcakes. If you are looking for great quality products and fabulous friendly service, contact Stacy at Sugar and Spice.

So that was it really ... all that was left was to eat the cupcakes.


Merry Christmas - A selection of Christmas treats

As I spent Christmas with my family in Australia this year I didn't have much chance to do a lot of Christmas baking. However, I managed to get a few things in.

The first were some Christmas cupcakes. I used he hummingbird recipe that I have mentioned in previous blogs, both vanilla and chocolate. Simple buttercream on top (although if I'd not known beforehand I certainly proved the point that making buttercream in 39 degree temperatures isn't a great idea).

I ordered some cupcake toppers from Baking Pleasures and that was that.


The second item I made was a Christmas cake. My mum had made the cake already, I just competed the decoration. Normally you would cover the cake in Marzipan and then rolled fondant but on this occasion I just used the fondant. A few simple decorations using mould, cutters and some paste food colouring and the job was done in an hour or so.


Merry Christmas!!!


Saturday, 3 November 2012

Happy Birthday Anya!

So this weekend has been my second real project cake: a 1st birthday cake for the gorgeous Anya who turned 1 a few weeks ago.

This one didn't turn out exactly how I had planned it out in my head, but rather a lot more of an 'improvisation along the way' kind of job. But I'm still pleased with how it turned out. And like with every cake I make, I learned a few valuable lessons along the way.

So here it is, a beautiful celebration scene for a beautiful little girl.


And here is how I did it. 

My initial intention was to make a fanfetti cake like this but for some reason all my 100's and 1000's disappeared into the cake when it was in the oven ... so it's pretty much just a plain butter cake. That was the first thing that didn't go according to plan. The second was the size of the cake. I had intended to make one large block with Anya's name around the 4 sides, however the 6x6" size I made would have only been 4" tall with the 1 quantity of cake mix the recipe made. So, again I improvised and decided to cut the 2 6" cakes into 4 individual squares and make 4 blocks to spell Anya's name, as you can see below.  


Next it was assembly time. I used vanilla buttercream (same recipe as I usually use) to sandwich the 2 layers of each block together and then covered each block with a layer of buttercream to form the base layer for the rolled fondant. This was a little tricky and messy but the cakes are sturdy enough to withstand a bit of handling. A good tip if you find you buttercream difficult to spread is to dip you palette knife in some hot water. Make sure you dry it off as you don't want any excess water in your buttercream, but it will make spreading it, especially around the sides of your cake a lot easier.


Next was the rolled fondant. I used Ivory for the base colour just because I didn't want it to be bright white, but you could use any colour you like. I was tempted to go with a pale yellow colour but decided to stick with the ivory as it meant one less batch to colour by hand. 

I rolled out the ivory and covered each block. This once again was a bit tricky and I tried a few different methods. The one I found most successful was to cut along strip of fondant that is the width of the cake (in this case 3"x3") and then wrap it around the sides of the cake. Then cut out at 3"x3" square for the top of the cake. I used a ball tool to smooth the joins, but since I was planning to cover the sides with buttercream I knew no one would notice the join lines. 

I then cut out letters (making sure I had one letter form Anya's name in each colour) from 4 different colours of fondant which I coloured using Sugarflair paste colours.  Sticking them onto the 4 cakes was simple: just brush the back of each letter with a small amount of water and stick on. 


Next it was the buttercream. Once again, coloured using Sugarflair paste colours. I piped tiny roses around each of the 3 sides of each block before lifting the cake using a spatula onto the covered board. Then I piped roses along the bottom edge of the cake, making sure to cover the join with the board.

All the decorations (Pooh, hunny pot and Butterflies) I made a few weeks ago and left to dry in a cardboard box on my bookshelf. I simply then stuck them around the cakes and on the board with a bit of buttercream and we are done.


All up this cake probably took me about 5 hours to make, but making the decorations ahead of time certainly saved me time last night.  If I was to do it again I would also cut out the letters ahead of time as that is the time consuming part as you have to colour the fondant, roll it out and cut out the letters. There is no reason why they couldn't be done weeks ahead and left to dry. 

Sunday, 28 October 2012

Up up and away.....

So, like I said last week I have a few project cakes in the coming weeks and toady saw the first: a cake for a farewell party for some lucky friends who are going off on a round the world trip.


So, here is how I did it. I made a 10" square chocolate Guinness cake using 2 quantities of the recipe I used in my first post, and layed it out on a 14" cake board, as you can see in the below picture. I chose to put mine off centre, but you could place it wherever you like on the board.


Next it was covering the cake. First I covered it in a crumb coat of plain buttercream, followed by some light blue fondant rolled out to fit the cake and the board.


Then it was time to decorate it. I cut out some clouds using a stencil image that I printed on the computer, and stuck them on using a bit of cold water and a paintbrush. The aeroplane I made ahead of time using white fondant and a little black for the decorations. Left to dry in a cardboard box it hardened nicely making it easier to place on the cake. Make sure you don't put any fondant decorations in an airtight container as they will sweat and so limp. Either leave them in open air or in a cardboard box to dry.


Some text cut out using an alphabet cutter and placed delicately on the cake along with some suitcases made from fondant and you're done. A simple piece of blue ribbon wrapped and glued around the side of the cake board for a finishing touch.


Free Blog Template by June Lily